Innovations come up with new exceptions. The same goes for Windows 10. Being a tech-savvy, they moved towards Windows 10 as soon as it was launched.
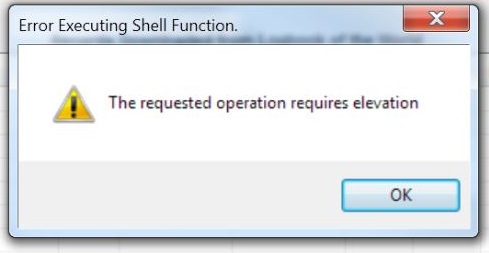
Not only them but also a banal man did the same, to utilize the better version for a better experience. Soon an issue was reported which spells “The Requested Operation Requires Elevation”.
Well, tech-savvy would easily understand the terms but layman wouldn’t. This message is shown when access to certain administrative features is restricted due to security purposes. To manage this issue, you can take any of the following solutions into consideration.
Read Also:
Understanding “The Requested Operation Requires Elevation” Error
“The Requested Operation Requires Elevation” is a Windows error message that appears when a user or an application attempts to perform a task that requires administrative privileges or elevated access rights.
In simpler terms, it means that the action you are trying to perform needs permission that exceeds the standard user’s authority.
Common Scenarios Where the Error Occurs
- Installation of Software: When trying to install or uninstall software that modifies system files or settings, elevation may be required.
- Modifying System Settings: Changing system configurations, such as network settings, firewall rules, or device drivers, often requires elevation.
- Accessing System Files and Folders: Attempting to access or modify sensitive system files and directories may trigger this error.
- Running Specific Applications: Some applications, particularly system utilities or certain software tools, need administrative privileges to function correctly.
Common Symptoms of the Error
When you encounter “The Requested Operation Requires Elevation” error, you may notice the following symptoms:
- Error Message: A dialog box or notification displaying the error message will appear on your screen, indicating that the operation requires elevation.
- Blocked Action: You will be unable to proceed with the action you intended to perform, such as installing software or changing system settings.
- Limited Functionality: Depending on the application or task, certain features or functions may be restricted until you provide the necessary elevation.
Causes of “The Requested Operation Requires Elevation” Error
Understanding why you encounter this error is crucial for effective resolution. Common causes include:
- Insufficient Permissions: Attempting to perform tasks that require administrative access without the necessary privileges can trigger the error.
- User Account Control (UAC) Settings: Windows UAC is designed to prevent unauthorized changes to your system. If your UAC settings are too strict, you may encounter this error more frequently.
- Corrupted User Profile: A corrupted user profile can lead to issues with permissions and cause elevation errors.
- Outdated Software: Older software that is not compatible with modern Windows versions may prompt elevation errors when running.
- Malware or Virus: Malicious software can interfere with system operations and trigger elevation errors.
How to Fix The Requested Operation Requires Elevation
Addressing this error requires a systematic approach to identify and rectify the underlying issues. Here are effective solutions to help you resolve “The Requested Operation Requires Elevation” error:
Solution 1: Disabling the UAC
Update each and every software, app, and OS from time to time. After the update, you will not encounter the bugs.
Thus, to avoid frauds, everything now is checked under UAC. UAC stands for User Access Control. This solution also works when we add a computer to any other domain and execution of administrative commands will hamper.
Step 1: To launch the local group policy editor, type “gpedit.msc” on the Run (Windows + R) tab and click OK. Handle with care while using this tool.
Step 2: On your screen’s left side, you will find a navigation pane. Follow the sequence: Computer configuration a Windows settings Security settings a Local Policies a Security Options.
Step 3: You will now find various items, scroll them down. Double-Click on “User Account Control: Behaviour of the elevation prompt for administrators in Admin “Approval Mode” for its properties.
Step 4: In the tab of Local Security Setting, set “Elevate without prompting”.
Step 5: Search and double-click on “User Account Control: Detect application installations and prompt for elevation” for its properties.
Step 6: In the “Local Security setting tab”, set Disabled option and press OK.
Step 7: Search and double-click “User Account Control: Run all administrators in Admin Approval Mode” for its properties.
Step 8: On the Local Security Setting tab, set Disabled and press OK.
Step 9: Search and double-click “User Account Control: Only elevate UI Access applications that are installed in secure locations” for its properties.
Step 10: On the Local Security Setting tab, set Disabled and press OK.
Step 11: Lastly, type “User Account Controls” on the start menu’s search bar (Windows + S). Drag the pointer to the least level and press OK.
Solution 2: Adding Domain Admins group to the local Administrators Group
It is only for the users who have registered their system to any other domain and now receiving an error message.
At first, define a Security group. Then follow these steps.
Domain ControlleràRight-click on UsersàSelect NewàGroupsàSecurityàRename with trusted members.
Second, create a group policy.
Group Policy Management ConsoleàRight-click on OUàCreate a GPO with linkà ‘Local Administrators’ named group policy.
Third, edit the Policy.
Step 1: Right-click on the ‘Local Administrator’ policy.
Step 2: Expansion of Computer configuration\Policies\Windows Settings\Restricted groups.
Step 3: On the right side of the Restricted group’s window, right-click on the empty space and choose “Add Group”.
Step 4: Name the group and press OK.
Step 5: Add “Administrators” and “Remote Desktop Users” in “This group is a member of:” and press OK.
Important: The GPO is set on automatic mode to match up the group. If the “Members of this group” changes, overwriting of the data in the account fixes everything.
At last, perform the testing to check whether steps are taken, have been in the correct direction or not.
Step 1: Log in to the system.
Step 2: Type “gpupdate/force”. Now, check whether the local administrator’s group has updated to the name provided by us.
Step 3: All the members in the group can easily access the system/PC.
Solution 3: Disabling the Admin Approval Mode for built-in Administrator
There is a possibility that your system has by default enabled “Admin Approval for built-in Administrator”. Follow the steps accordingly:
Step 1: Firstly, on the Run tab, type “gpedit.msc” and press OK.
Step 2: In the local group policy editor tab, follow this sequence: Computer configuration à Windows Settings à Security settings à Local Policies à Security Options.
Handle this care while using this tool.
Step 3: On the right side, scroll down the items and double-click on “User Account Control: Admin Approval Mode for the Built-in Administrator Account Local Security Setting tab” for its properties.
Step 4: Lastly, set Disabled as the choice and press OK.
Solution 4: Changing Ownership of Files
Changing ownership is completely your wish to do it either manually. Else, create a “Change ownership” button for the context menu.
It can happen that you are using a new system and now you want to access the backed -up data from the hard drive. By hard drive, I meant, the external ones. This may show an error. Thus, to resolve it, just right-click and select properties. Now follow the instructions that come your way. To access any sort of file at ease on the system, just change the ownership to make yourself the owner.
Solution 5: Running the Program as Administrator
Most often there is an error while execution of some commands on Command prompt. The reason behind this are the administrative rights. It always asks for permission to perform any task or open a file or a folder.
Thus, to cope up with this issue, type “Command prompt” after pressing Windows + S. Then right-click and choose “Run as administrator”.
Read Also:
Conclusion
At last, I would like to conclude my part by saying, perform any solution out of the above, you will have a positive result.
Also, remember. After applying the whole change, always restart the computer to avoid any sort of failure. Now, you are good to go and work on your system at peace with no further interruptions.


